Background:
You may have noticed that your bolt pull is scratchy, and getting worse. If the rifle is new, or the problem has been getting worse over time, the issue is most likely caused by a poorly cut cylinder slot from the factory. Fret not plastic slingers, there's an easy solution that should only take about 10 minutes.
A VSR10/SSG10 cylinder is typically made by first creating a long tube of metal, then cutting a slot in it. This slot is there to allow the trigger to reach through the cylinder and grab the piston and spring, enabling the rifle to function.
When the bolt is pulled back, the bits that reach inside the cylinder from the trigger to the piston and spring often rub up against the sides of the cylinder slot. This causes significant wear over time, as the long metal slot acts as a saw, cutting away at the trigger parts. Depending on the rifle, this causes scratching that can be felt immediately after unboxing (many SSG10s), or after a while once the cylinder has rubbed against the trigger parts enough to cut into them. Either way, the scratching will happen to all rifles with traditional triggers eventually, resulting in an unsatisfying and scratchy bolt pull, and eventually wear on the components causing metal dust to get into your cylinder, or even failure. The solution is cylinder slot sanding.

How to Sand Your Cylinder Slot
What you'll need:
- 1 piece of 150-200 grit sand paper
- 1 piece of 400-600 grit sand paper
- 1 piece of 800+ grit sand paper
- Silicone Oil
- Paper towels
⚠ Make sure to do this process outside, or in a well ventilated area. Metal dust is no joke ⚠
Part 1) Disassembly
Step 1) Remove the rifle upper from the stock:
Turn your rifle over and locate the three screws going from the stock to the upper. Unscrew these and remove the upper from the stock by lightly pulling the stock off upper receiver.
Once the stock has been removed, unscrew the small screw on the under side of the rifle towards the back.

Unscrewing this will allow you to unscrew the outer barrel from the receiver.
If done correctly, you should have a piece like this:

Step 2) Unscrew the Cylinder Head:
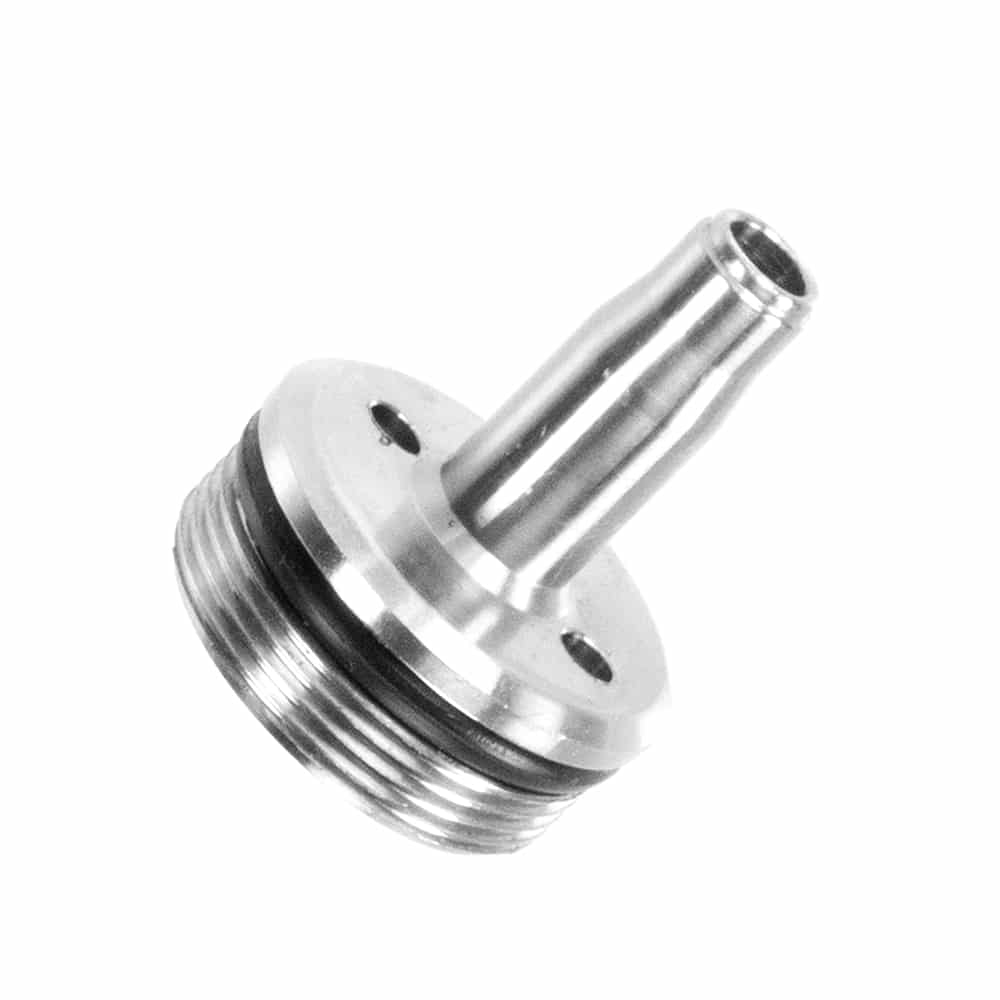
Depending on the type of cylinder head you have, different tools will be required for opening the cylinder. If you have an hole type cylinder head (as shown by the two holes located on the top of this SSG10 cylinder head), remove it from the cylinder by sticking needle nose pliers in the two holes and twist counter clockwise to open.
If you have a wrench type cylinder head such as the airsoftMarshall high flow cylinder head, use an adjustable wrench to grip the cutouts and twist counter clockwise to open.
Step 3) Remove the Cylinder Contents:
Remove the piston, spring and spring guide from the cylinder. You may have to pull the trigger to let it release.
Step 4) Remove the Trigger Assembly:
Unscrew the two screws found at the top and bottom of the trigger assembly. Once done, you should be able to free pull the trigger assembly off the receiver.

Step 5) Remove the Cylinder from the Receiver:
Now that the trigger and cylinder contents have been removed, the cylinder should freely come out of the reciever,
Part 2) Sanding the Slot
Step 6) Gauge the Slot:
Use your finger nail to lightly rub against the sides of the cylinder slot to feel for bumps and scratches. This should feel smooth, with no bumps or ridges. If it's not perfectly smooth, your slot needs sanding. Keep following the guide.
Step 7) Sand the Slot (150-200 grit):
Using 150-200 grit sandpaper, repeatedly rub the sides of the cylinder slot evenly across it's entire length until there are no distinct bumps. This is a rough sand paper, so it will feel a bit rough still, but we are just trying to remove any significant defects for now. You can tell you're done by when the slot looks and feels relatively even all the way across. Don't worry about a tiny bit of roughness, we'll polish it later. Try not to do more than you need.
Step 8) Sand the Slot (400-600 grit):
Once the significant defects have been removed, move on to sanding the slot with 600-800 grit sand paper. Sand until the slot has a glossy finish, or until no bumps can be felt with your finger nail.
Step 9) Sand the Slot (800+ grit):
Polish the slot with 1000+ grit sand paper to a mirror finish. This step is not completely necessary, but will aid in making your pull just a tad smoother.
Part 3) Cleaning and Reassembly:
Step 10) Clean the cylinder:
Once no more bumps can be felt with your finger nail, and the slot sides look sufficiently shiny, it's time to clean your cylinder. We like to run the cylinder under water with soap for a few seconds, then twist up a web paper towel and spin it around in the cylinder, removing it and replacing it until there is no more black dust or gunk on the towel. Rinse again to remove the soap, and then finally twist up dry paper towel and spin it around in the cylinder to remove all the moisture. Ensure to thoroughly dry the entire cylinder assembly.
Step 11) Regreasing:
Because we've thoroughly cleaned the cylinder and removed all the grease and particles, we're going to have to relubricate it. Put a small amount of silicone oil on the end of your finger and rub it around the inside of the cylinder, being careful to make a circle all way around.
Place the piston in the cylinder and push it up and down, allowing the grease to coat the entire inside. be careful not to damage the rubber piston parts on the threads.
Finally, eliminate any excess grease that is on the very top of the piston (not the sides).
Applying some grease to the outside of the cylinder isn't necessary, but may result in a smoother bolt pull.
Step 12) Reassembly:
Put cylinder back in the receiver, and then reattach the trigger by the same screws used to remove it. Ensure that the spring guide stopper goes inside the cylinder slot. Once finished, put the spring guide stopper, spring, and spring guide back into the cylinder, and put the cylinder head back on the cylinder to hold everything inside. Make sure you avoid touching the outside of the head with anything greasy. We want to keep all the grease inside the cylinder.
Next, screw your outer barrel into your receiver, tightening it until the end, then unscrewing by one whole turn to ensure everything is seated properly. Screw in the tiny outer barrel that connects the outer barrel and receiver, and then put the entire assembly back in the stock.
To put the rifle upper back on the stock, screw in the in the three large screws on the bottom of the stock and ensure everything is seated properly. If done correctly, your rifle should feel much smoother now.
Expect your first few shots from the rifle to be a little bit weaker as the rifle has to move the grease back around inside of it. If it doesn't go back to within 15 fps of originally, consider applying more grease.
Community Videos/Tutorials:
If you have any further questions, see the following video tutorials. They were not made by us, but they are pretty good so we figured they could help:
Rifle Disassembly and Maintenance by Novrtisch
Cylinder Sanding by Silo Entertainment
Don't forget to clean and lube before reassembly!
Disclaimer:
Photos in this article were borrowed from the Novritsch Ltd website and Novritsch SSG10 Dissassembly and Maintenance Video. They are not owned by Namech.