

How to install a new VSR10/SSG10 Spring Guide
What you'll need:
- Metric allen key set
- VSR10/SSG10 Spring Guide
Part 1) Disassembly and Install
Step 1) Remove the rifle upper from the stock:
Turn your rifle over and locate the three screws going from the stock to the upper receiver. Unscrew these, then remove the upper from the stock by lightly pulling the stock off upper receiver.
Once the stock has been removed, unscrew the small screw on the under side of the rifle towards the back.

Unscrewing this will allow you to unscrew the outer barrel from the receiver.
If done correctly, you should have a piece like this:

Step 2) Unscrew the Cylinder Head:
⚠ Step 2 and 3 are highly recommended when installing a Flux Trigger. Installation can be difficult otherwise. Assembling too aggressively can result in damage to the Teflon sear shims and stopper bearing.
These steps are not required when installing other other triggers as they are less complex ⚠
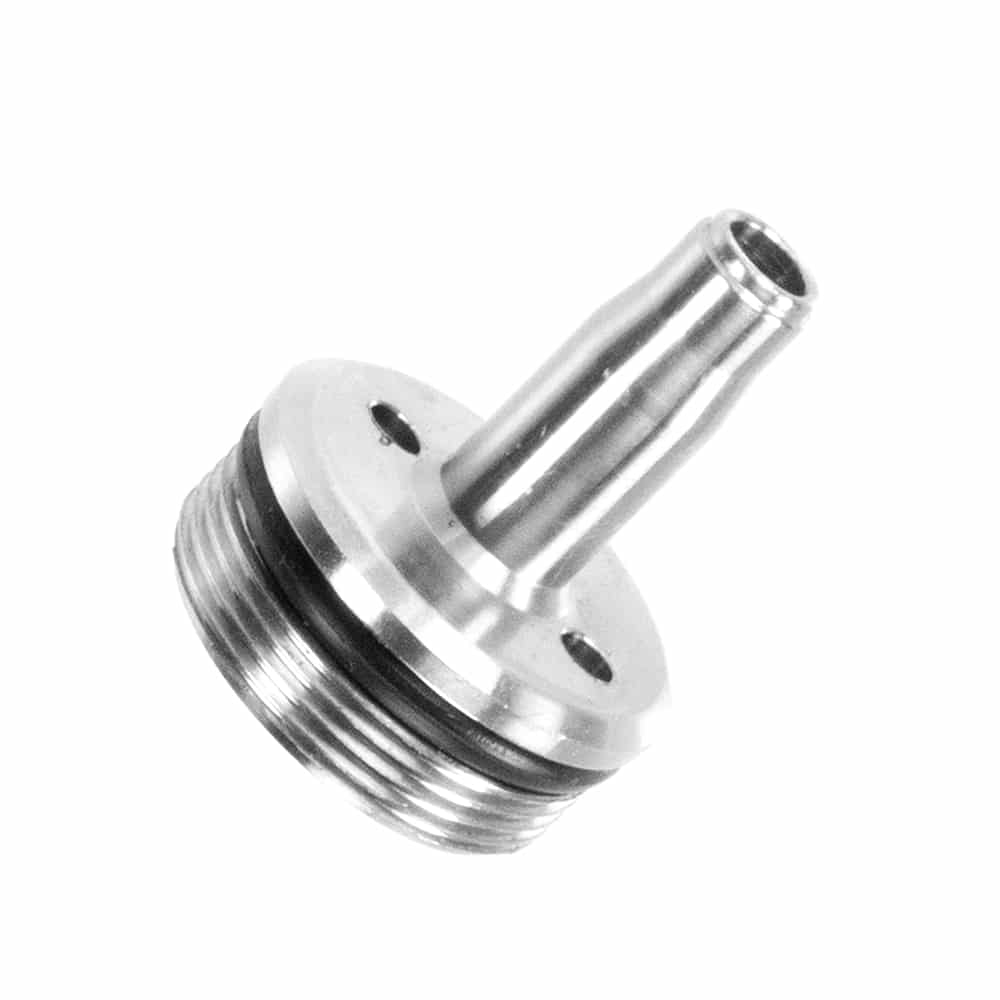
Depending on the type of cylinder head you have, different tools will be required for opening the cylinder. If you have an hole type cylinder head (as shown by the two holes located on the top of this SSG10 cylinder head), remove it from the cylinder by sticking needle nose pliers into the two holes and twisting counter clockwise to open.

If you have a wrench type cylinder head such as the airsoftMarshall high flow cylinder head, use an adjustable wrench to grip the cutouts and twist counter clockwise to open.
Step 3) Remove the Cylinder Contents:
Remove the piston, spring and spring guide from the cylinder. You may have to pull the trigger to let them release.
Step 4) Replace the Original Spring Guide:
Place the new spring guide where the old one was.
Part 2) Reassembly
Step 11) Reassembly:
Put the cylinder contents back into the cylinder, and put the cylinder head back on the cylinder to hold everything inside. Make sure you avoid touching the top of the cylinder head with anything greasy. We want to keep all the grease inside the cylinder, and out of the hop up.
Next, screw your outer barrel into your receiver, tightening it until it resists, then unscrewing by one whole turn to ensure everything is seated properly. Screw in the tiny outer barrel screw that connects the outer barrel and receiver, and then put the entire assembly back in the stock.
To put the rifle upper back on the stock, screw in the in the three large screws on the bottom of the stock and ensure everything is seated properly. If done correctly, your rifle should properly and smoothly cycle.