Background:
The trigger assembly is the most important part of a bolt action spring rifle. It houses all of the inner workings of the rifle that allow it to fire. A bad trigger is the most common point of failure in a VSR based rifle.
Pictured below are the core components of a VSR style trigger assembly. We chose the SSG10 trigger to use as an example, as it's design is simple and easy to understand:


There are two types of triggers found on the VSR/SSG system: 45° triggers, and 90° triggers. The difference between these is the angle the sear holds the piston. Typically, 45° triggers are found in cheaper stock rifles and certain hpa builds. This style of trigger golds the piston at an angle. 90° triggers are often found on higher end higher power rifles like the SSG10, and hold the piston straight up and down.
See below for a comparison of a stock 45° trigger and a highly upgraded 90° Flux trigger:

The flux trigger looks a little different than most triggers as it has a ball bearing on the spring guide stopper. This serves to eliminate the wear that happens when the bolt is pulled and the cylinder scratches the stopper.
Almost all higher-end bolt action spring rifles (BASR) should get a 90° trigger installed if they don't already have one. They are significantly stronger, and lead to a much smoother and longer lasting rifle. Unless you're building a highly specialized hpa build, 45° triggers are a waste of time.
Common 90° triggers include:
Flux Trigger by Namech
SSG10 Trigger by Novritsch/Bulltrig
S-Trigger by Springer Custom Works
Bulltrigger by Bulltrig
Maple Leaf 90 degree trigger
Action Army/Laylax 90 degree trigger
airsoft pro 90 degree trigger
pdi 90 degree trigger
emg fieldcraft trigger
90° triggers are also required when installing other upgrade parts, as high quality upgraded pistons are only compatible with 90° sears. We do not recommend purchasing a 45° upgrade piston, as typically it's just a waste of time.
How to install a new VSR10/SSG10 Trigger
What you'll need:
- Metric allen key set
- VSR10/SSG10 trigger
- screws that came with the trigger or are already installed on the rifle
Part 1) Disassembly and Install
Step 1) Remove the rifle upper from the stock:
Turn your rifle over and locate the three screws going from the stock to the upper receiver. Unscrew these, then remove the upper from the stock by lightly pulling the stock off upper receiver.
Once the stock has been removed, unscrew the small screw on the under side of the rifle towards the back.

Unscrewing this will allow you to unscrew the outer barrel from the receiver.
If done correctly, you should have a piece like this:

Step 2) Unscrew the Cylinder Head:
⚠ Step 2 and 3 are highly recommended when installing a Flux Trigger. Installation can be difficult otherwise. Assembling too aggressively can result in damage to the Teflon sear shims and stopper bearing.
These steps are not required when installing other other triggers as they are less complex ⚠
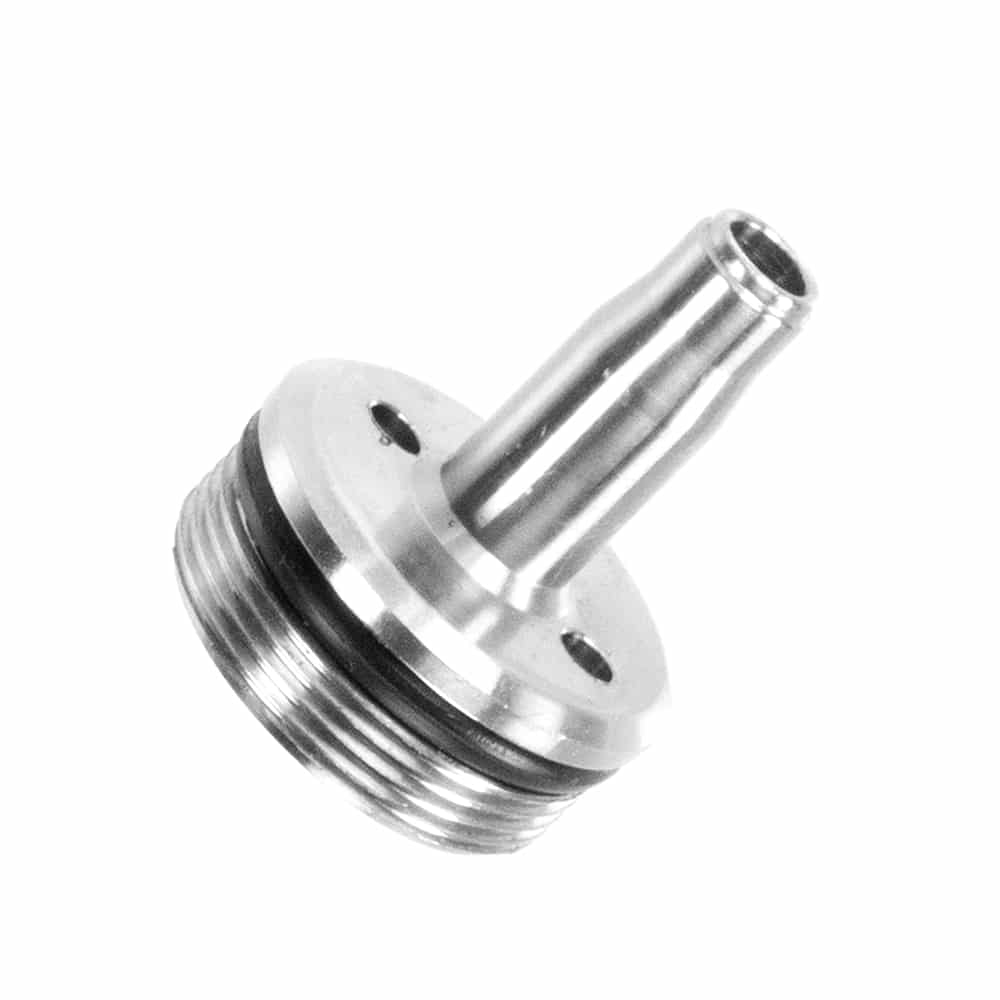
Depending on the type of cylinder head you have, different tools will be required for opening the cylinder. If you have an hole type cylinder head (as shown by the two holes located on the top of this SSG10 cylinder head), remove it from the cylinder by sticking needle nose pliers into the two holes and twisting counter clockwise to open.

If you have a wrench type cylinder head such as the airsoftMarshall high flow cylinder head, use an adjustable wrench to grip the cutouts and twist counter clockwise to open.
Step 3) Remove the Cylinder Contents:
Remove the piston, spring and spring guide from the cylinder. You may have to pull the trigger to let them release.
Step 3.5) Sand Cylinder:
If you are using an SSG10, or just want a MUCH smoother bolt pull, you should sand your cylinder slot. Follow the guide here.
Step 4) Remove the Trigger Assembly:
Unscrew the two screws found at the top and bottom of the trigger assembly. Once done, you should be able to pull the trigger assembly off the receiver.

Step 5) Insert New Trigger into Receiver:
Now that the old trigger has been removed, simply install the new trigger by pushing it into the receiver where the old trigger was. Ensure that the stopper is pushed into the cylinder slot and behind the spring guide. It will not go in otherwise.
It is recommended to use whatever screws your new upgrade trigger came with. This ensures they aren't too long and will scratch the cylinder. If you do not have new screws, make sure the screws do not poke all the way through the receiver.
Part 2) Reassembly
Step 11) Reassembly:
If removed, put the spring guide stopper, spring, and spring guide back into the cylinder, and put the cylinder head back on the cylinder to hold everything inside. Make sure you avoid touching the top of the cylinder head with anything greasy. We want to keep all the grease inside the cylinder, and out of the hop up.
Next, screw your outer barrel into your receiver, tightening it until it resists, then unscrewing by one whole turn to ensure everything is seated properly. Screw in the tiny outer barrel screw that connects the outer barrel and receiver, and then put the entire assembly back in the stock.
To put the rifle upper back on the stock, screw in the in the three large screws on the bottom of the stock and ensure everything is seated properly. If done correctly, your rifle should feel much smoother now.
Community Videos/Tutorials:
If you have any further questions, see the following video tutorials. They were not made by us, but they are pretty good so we figured they could help:
Rifle Disassembly and Maintenance by Novrtisch
Disclaimer:
Photos in this article were borrowed from the Novritsch Ltd website and Novritsch SSG10 Dissassembly and Maintenance Video. They are not owned by Namech.
90 vs 45 degree Trigger Drawing was produced by StipTheSniper.